
Lectures
Supporting information and lecture slides may be found here.- Handover of the first project final version is scheduled on the 18th of March. The list of individual assignments is available here and referenced examples are here. You can find some hints how to solve common issues here or send me an email with your specific problem.
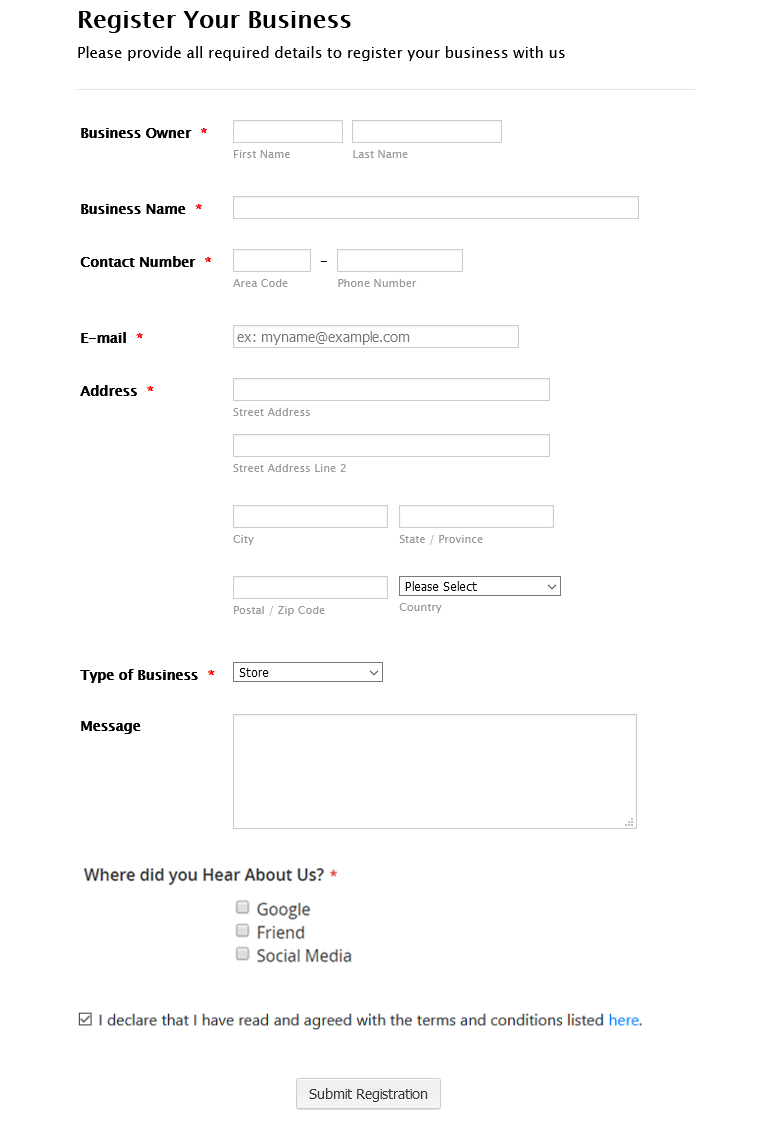
- Handover of the second project final version is scheduled on the 8th of April. The goal of the second project is to create an HTML page using Bootstrap that will feature a form with a similar level of complexity to this one. The form will contain a similar number of fields, which will be arranged on the page so that their size and type reflect the expected input. Responsive behavior when the browser window is resized is also required. The minimum functionality will be as follows. The Submit button will send data (POST method) to the server using a JSON message, and at least two elements on the page will be pre-populated based on data retrieved from the server (GET method, e.g., dropdown menus). An example of a simple server implementation using the Flask framework and the corresponding HTML page, including the relevant JavaScript, can be found here. Here are some tips and examples for creating an HTML page using Bootstrap. To get the points, you must present your results at the exercise or email me before the due date.
- Handover of the third project final version is scheduled on the 13th of May. Add at least 5 another control widgets which will control the look and behaviour of the Clock Widget. We have already placed two widgets. One DateTime widget for displaying the current time from our Clock Widget and one spin box widget for changing the font size. In total, at least 7 widget should be interactively controling the look and behaviour of the Clock Widget component.
- Handover of the small assigments from labs is scheduled on the 13th of May. These include Exercises 1 and 2 in Python, as well as Exercise 2 in Qt/C++.
- The final test will take place on May 20 at 1:00 PM in office EA408. The questions will be based on the “theoretical” part of the presentation.
Instructional video with rebuilding the project is here.
Instructional video showing how to fix the project is here.
Example for the VS 2019 with the custom component from the exercise (Clock widget) is here.
Example for the QT Creator 7 with the custom component from the exercise (Clock widget) is here.
Instructional video showing how to run the Qt Designer is here.
Instructional video showing how to connect two widgets in the Qt Designer is here.
Instructional video showing how to assign layouts in the Qt Designer is here.
Lecture 1
Introduction. Links for further reading on topics mentioned during this lecture are here.
Lecture 2
Laying out Widgets. Layout management under Tkinter and Python using pack.
Lecture 3
Laying out Widgets. Layout management under Tkinter and Python using grid.
Excercise 1
Python/Tk introduction. You can find our very first script here.
Excercise 2
Laying out Widgets - pack. You can start with our previous example and follow the slides 15-29 and modify appropriately the method createWidgets in the class Application. An example script from this exercise can be found here.
Excercise 3
Laying out Widgets - grid. You can start with our first example and follow the slides 28, 30-36 and modify appropriately the method createWidgets in the class Application.
Excercise 4
Laying out Widgets - Scrollable Frame and Tables. You can download the table component from the slide 61 here.
Excercise 5
Multi Windows - You can download the example how to create two or more separate windows here.